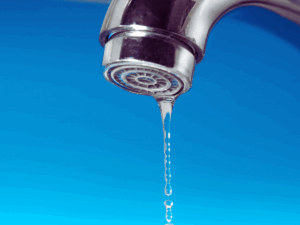
 A leaky faucet wastes gallons of water every day. What seems like a minor drip can add up to higher utility bills and even long-term water damage.
The good news is that most leaks trace back to a few common problems. By understanding what causes a leaking faucet, you can decide when to fix it yourself and when to call a professional.
What Causes a Leaky Faucet?
A leaky faucet is often caused by worn washers, damaged O-rings, or corroded valve seats. It can also happen due to high water pressure or loose faucet parts.
Over time, these problems can cause water to drip even when the tap is off. This leads to wasted water and possible plumbing damage if not fixed.
Common Causes of a Leaky Faucet
Most leaking faucets fall into a handful of categories. These issues happen across different types of faucet designs, including cartridge faucets, ball faucets, disc faucets, and compression faucets.
1. Worn-Out Washers
Rubber washers sit inside the faucet and press against the valve seat when you turn the water off. Constant friction wears them down over time.
A worn out washer can no longer form a proper seal, allowing water to drip. If the washer was the wrong size or poorly installed, it may fail even faster.
2. Damaged O-Rings
O-rings are small rubber rings and seals that help keep faucet handles in place and prevent leaks around the spout. When they loosen or wear down, water begins seeping from the base of the handle. This is a common problem with cartridge faucets and ball faucets.
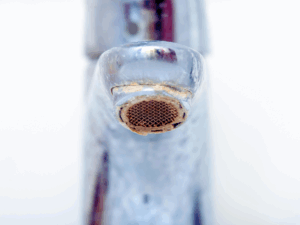
3. Corroded Valve Seat
The valve seat connects the faucet to the spout. Sediment in the water supply can build up on the valve seat, causing corrosion and creating leaks around the spout.
A simple way to extend the life of the valve seat is to clean it with white vinegar during regular maintenance.
4. Faulty Faucet Cartridge
In cartridge faucets, the cartridge controls the flow of hot and cold water. If the cartridge becomes damaged or clogged with debris, the faucet doesn’t seal correctly. This often results in a steady drip even after you shut off the water.
5. High or Fluctuating Water Pressure
Water pressure that is too strong can force water past seals and washers. If you see a leak that happens only at certain times, like at night, it could mean your water pressure is changing.
Ignoring this issue can create more damage in valves under the sink and across the plumbing system.
6. Loose or Broken Faucet Parts
Over time, faucet parts loosen. Packing nuts and adjusting rings may shift out of place. Handles may no longer fit tightly.
Even a small movement allows water to escape. In some cases, broken pipes or fittings under the sink create leaks that look like they come from the faucet.
Signs a Leaky Faucet Needs Repair
 It is easy to ignore a slow drip, but the signs build over time. A faucet doesn’t fix itself, and the longer it leaks, the worse the damage becomes.
Watch for:
- Constant dripping even when the handle is turned off.
- Rust spots or mineral buildup around handles and spouts.
- Rising water bills despite normal household use.
How to Fix a Leaky Faucet at Home
Many homeowners can fix a leaky faucet with a few tools and replacement parts. Always start by covering the sink with a towel or cloth so small pieces don’t fall into the drain.
Step 1: Shut Off the Water Supply
Find the valves under the sink and turn off the water supply. Turn the faucet on to release any pressure and confirm the water is off.
Step 2: Disassemble Faucet Handles
Remove the faucet handle using a screwdriver or Allen wrench. Keep all parts in order so you can reassemble them later.
Step 3: Inspect Washers, O-Rings, and Cartridges
Look for worn out washers, damaged rings and seals, or clogged cartridges. A cartridge faucet may need a full cartridge replacement.
Step 4: Clean Valve Seats with White Vinegar
Soak the valve seat in white vinegar to dissolve mineral buildup. This prevents corrosion and helps the faucet seal properly again.
Step 5: Replace Damaged or Worn Parts
Install new rubber washers, O-rings, or cartridges as needed. Always match the replacement part to the type of faucet you have.
Step 6: Reassemble and Test Faucet
Put the faucet back together in reverse order. Turn on the water supply and test the faucet for leaks.
When to Call a Professional Plumber
 Not every leaking faucet is a simple repair. Severe corrosion, broken internal parts, or hidden leaks under the sink may be beyond a quick DIY fix.
A professional plumber has the tools and knowledge to diagnose the problem and make a long-term repair. Expert service saves water, lowers utility bills, and ensures your bathroom fixtures work reliably.
Stop the Drip with the Plumbing Genius
Leaky faucets waste gallons of water every day and can cause unnecessary damage to your home. Most leaks come down to common problems like a worn out washer, a faulty O-ring, or high water pressure.
Simple repairs can stop the drip, but if the leak continues, Comfort Experts is ready to help. Call the plumbing genius today for professional faucet repair and replacement services you can count on.